How to Set Up Django REST Framework with React — Step by Step (Full-Stack Guide)
By Kaushal Patel9 min read
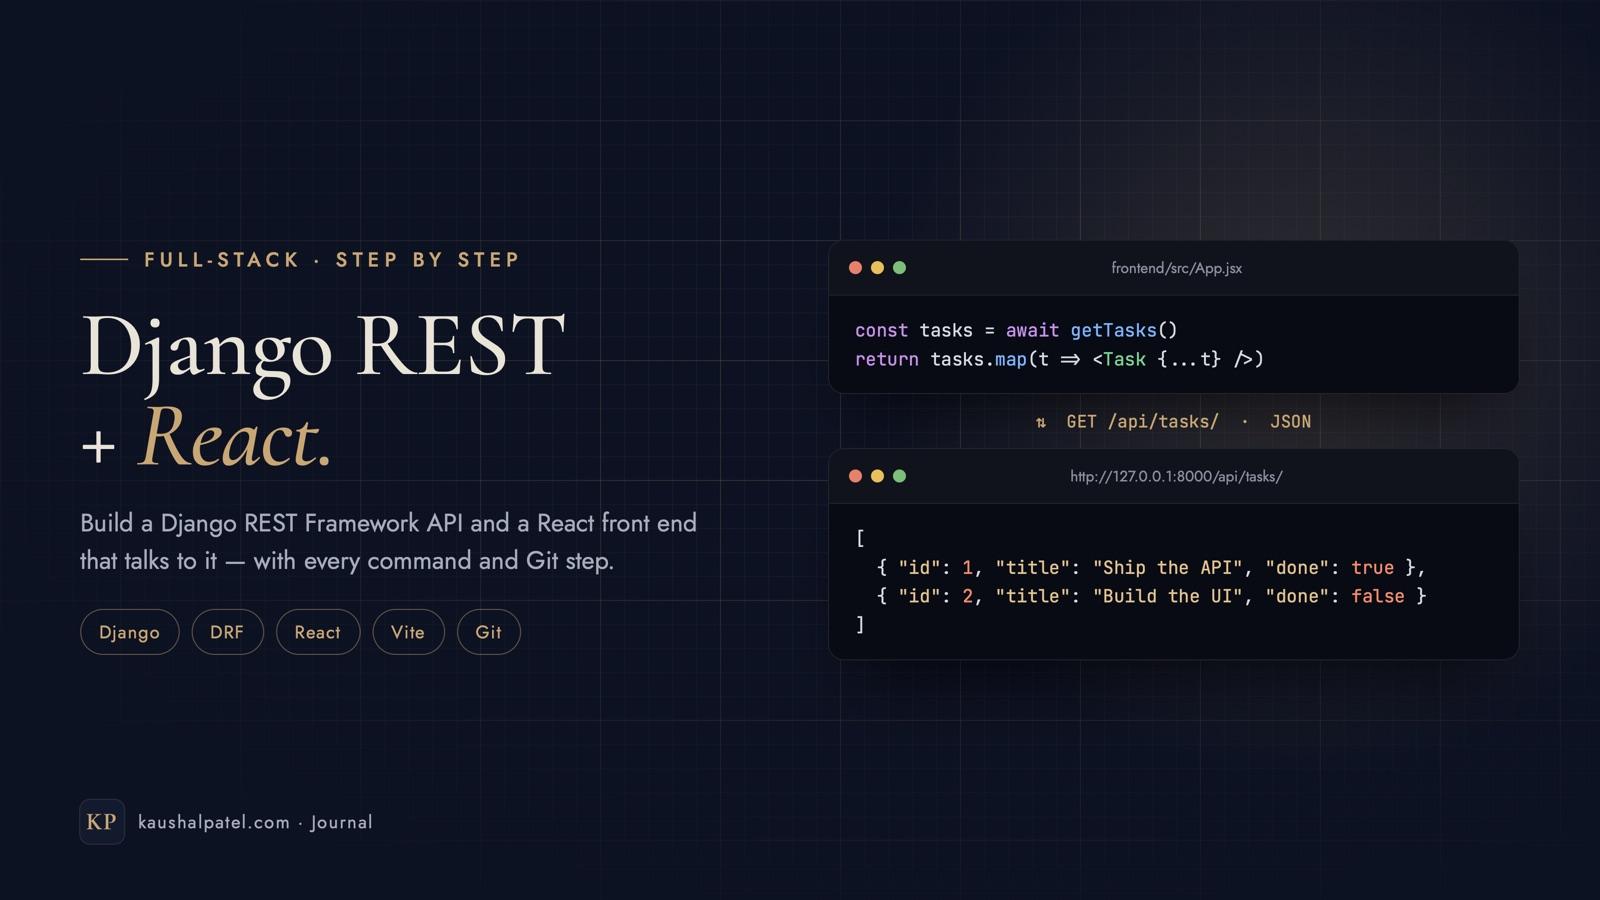
Django is brilliant at data, admin and business logic. React is brilliant at fast, interactive interfaces. Put them together — Django with Django REST Framework as the API, React as the front end — and you get one of the most popular full-stack setups there is.
In this guide we’ll build a small Tasks app from scratch: a REST API you can create, list, update and delete tasks with, and a React interface that uses it. Every command is included, and we’ll commit to Git as we go.
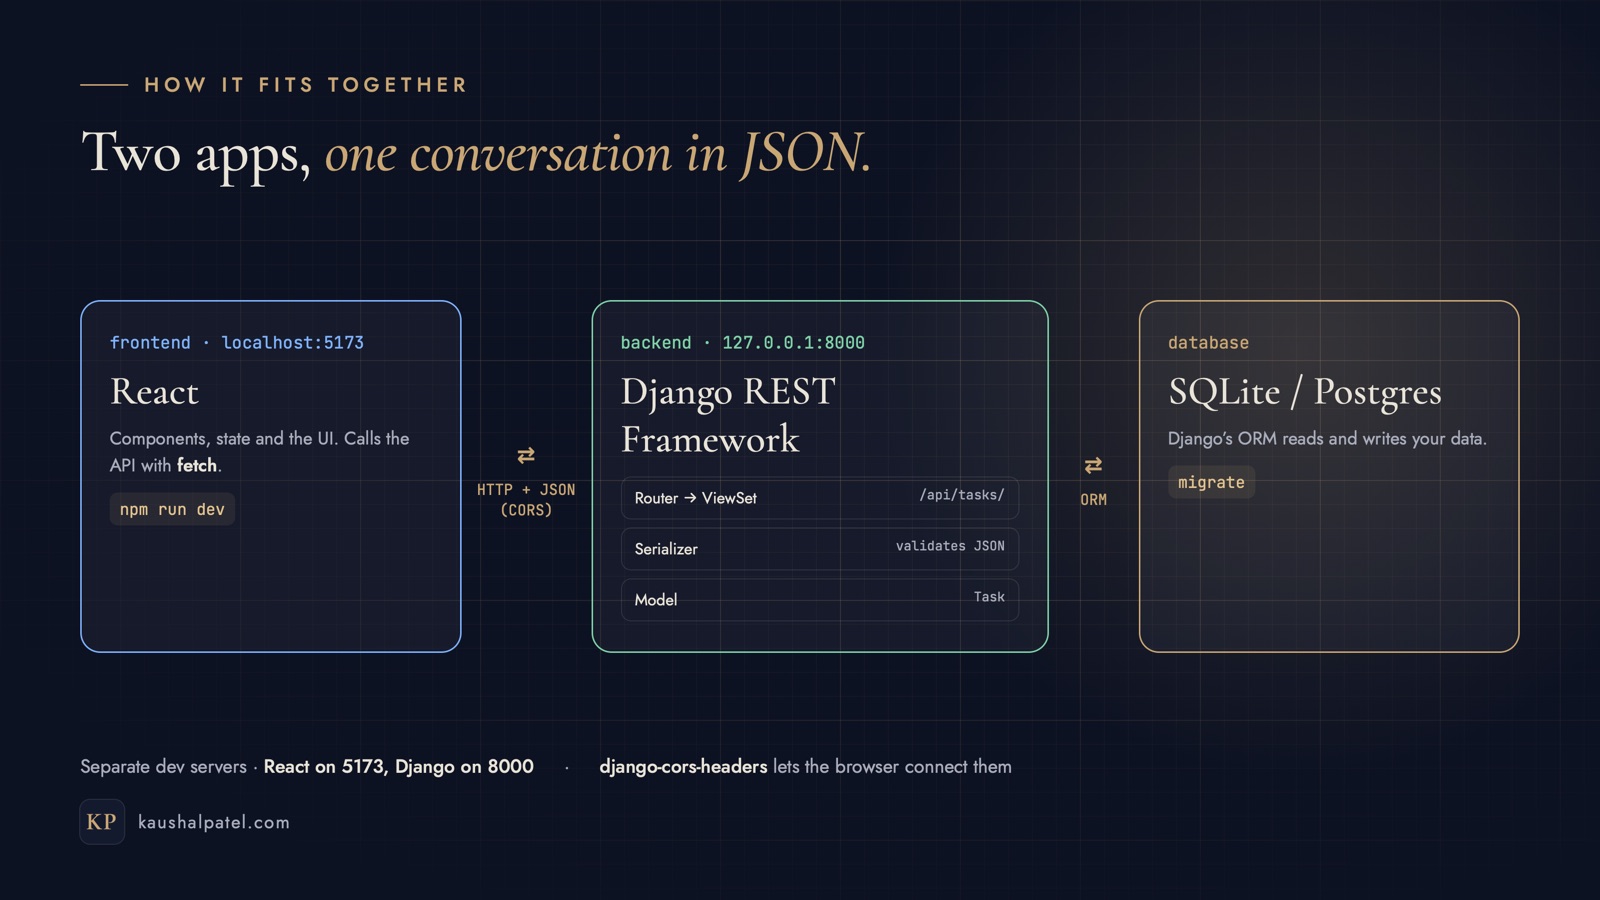
Two apps that talk in JSON: React in the browser, Django REST Framework on the server.
What you’ll need
Python 3.10 or newer — this guide uses Django 5.2 LTS.
Node.js 20 or newer and npm.
Git, and a GitHub account if you want to push your code.
Two terminal windows — one for Django, one for React.
Step 1 — Create the project folder and Git repository
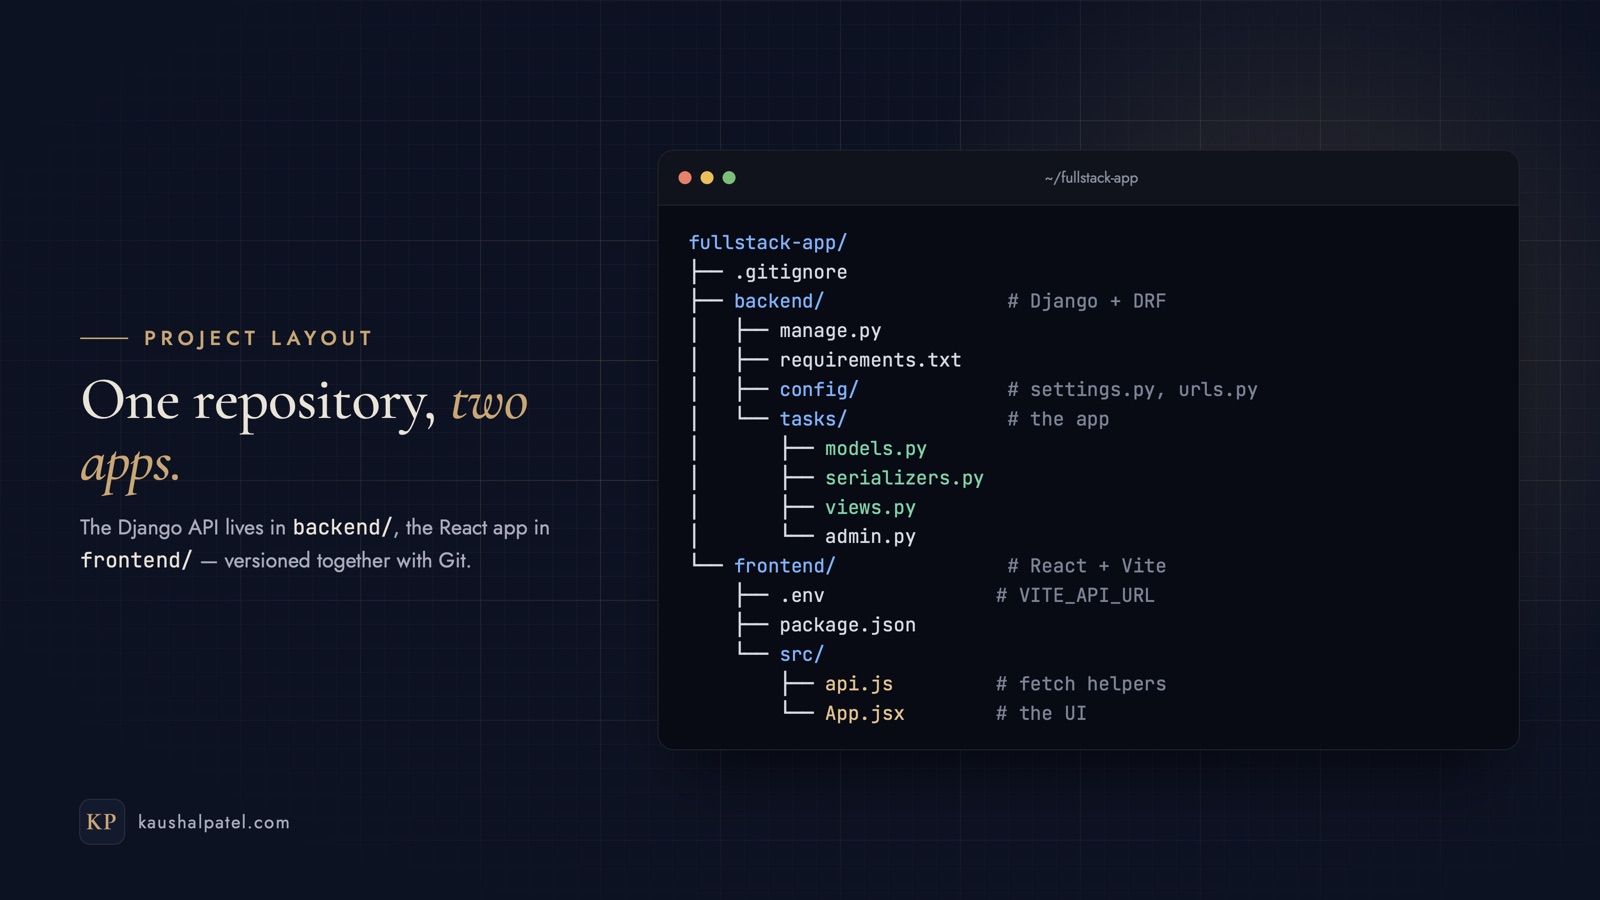
We’ll keep both apps in one repository: backend/ for Django and frontend/ for React.
mkdir fullstack-app && cd fullstack-app
git init
Create a .gitignore in this folder so virtual environments, installed packages, build output and secrets never reach Git:
# Python
backend/.venv/
__pycache__/
*.pyc
backend/db.sqlite3

# Node
frontend/node_modules/
frontend/dist/

# Secrets and local settings
.env
Step 4 — Build the API: serializer, ViewSet and router
A serializer turns Task objects into JSON and validates incoming JSON. Create tasks/serializers.py:
from rest_framework import serializers

from .models import Task


class TaskSerializer(serializers.ModelSerializer):
    class Meta:
        model = Task
        fields = ["id", "title", "done", "created_at"]
        read_only_fields = ["id", "created_at"]
A ViewSet gives you list, create, retrieve, update and delete in a few lines. In tasks/views.py:
from rest_framework import viewsets

from .models import Task
from .serializers import TaskSerializer


class TaskViewSet(viewsets.ModelViewSet):
    queryset = Task.objects.all()
    serializer_class = TaskSerializer
A router creates the URLs. Replace config/urls.py with:
from django.contrib import admin
from django.urls import include, path
from rest_framework.routers import DefaultRouter

from tasks.views import TaskViewSet

router = DefaultRouter()
router.register("tasks", TaskViewSet)

urlpatterns = [
    path("admin/", admin.site.urls),
    path("api/", include(router.urls)),
]
That’s a complete REST API:
Method
URL
What it does
GET
/api/tasks/
List all tasks
POST
/api/tasks/
Create a task
GET
/api/tasks/1/
Get one task
PATCH
/api/tasks/1/
Update part of a task
DELETE
/api/tasks/1/
Delete a task
Step 5 — Allow the React app to call the API (CORS)
During development React runs on localhost:5173 and Django on 127.0.0.1:8000. Browsers block requests between different origins unless the server allows them — that’s what django-cors-headers is for. In config/settings.py, add its middleware near the top (before CommonMiddleware) and list the React address:
MIDDLEWARE = [
    "corsheaders.middleware.CorsMiddleware",  # ← as high as possible
    "django.middleware.security.SecurityMiddleware",
    # …the rest stay as they are
]

CORS_ALLOWED_ORIGINS = [
    "http://localhost:5173",
    "http://127.0.0.1:5173",
]
Step 6 — Test the API
python manage.py runserver
Open http://127.0.0.1:8000/api/tasks/. DRF’s browsable API shows an empty list and a form to add tasks right in the browser. Or test from a second terminal:
curl -X POST http://127.0.0.1:8000/api/tasks/ \
  -H "Content-Type: application/json" \
  -d '{"title": "Ship the API"}'

curl http://127.0.0.1:8000/api/tasks/
Save the dependencies and commit the backend (run these from the backend/ folder):
pip freeze > requirements.txt
git add .
git commit -m "Add Django REST API for tasks"
Step 7 — Create the React app with Vite
Leave Django running. In a second terminal, go back to the fullstack-app folder and create the front end:
npm create vite@latest frontend -- --template react
cd frontend
npm install
npm run dev
Open http://localhost:5173 to see the Vite + React starter. Now tell React where the API lives — create frontend/.env:
VITE_API_URL=http://127.0.0.1:8000/api
Step 8 — Talk to the API from React
Keep all API calls in one place. Create frontend/src/api.js:
Save, and the page at localhost:5173 reloads by itself. Add a few tasks, tick them off, delete one — then refresh the page and open /admin/ on the Django side: everything is stored in the database.
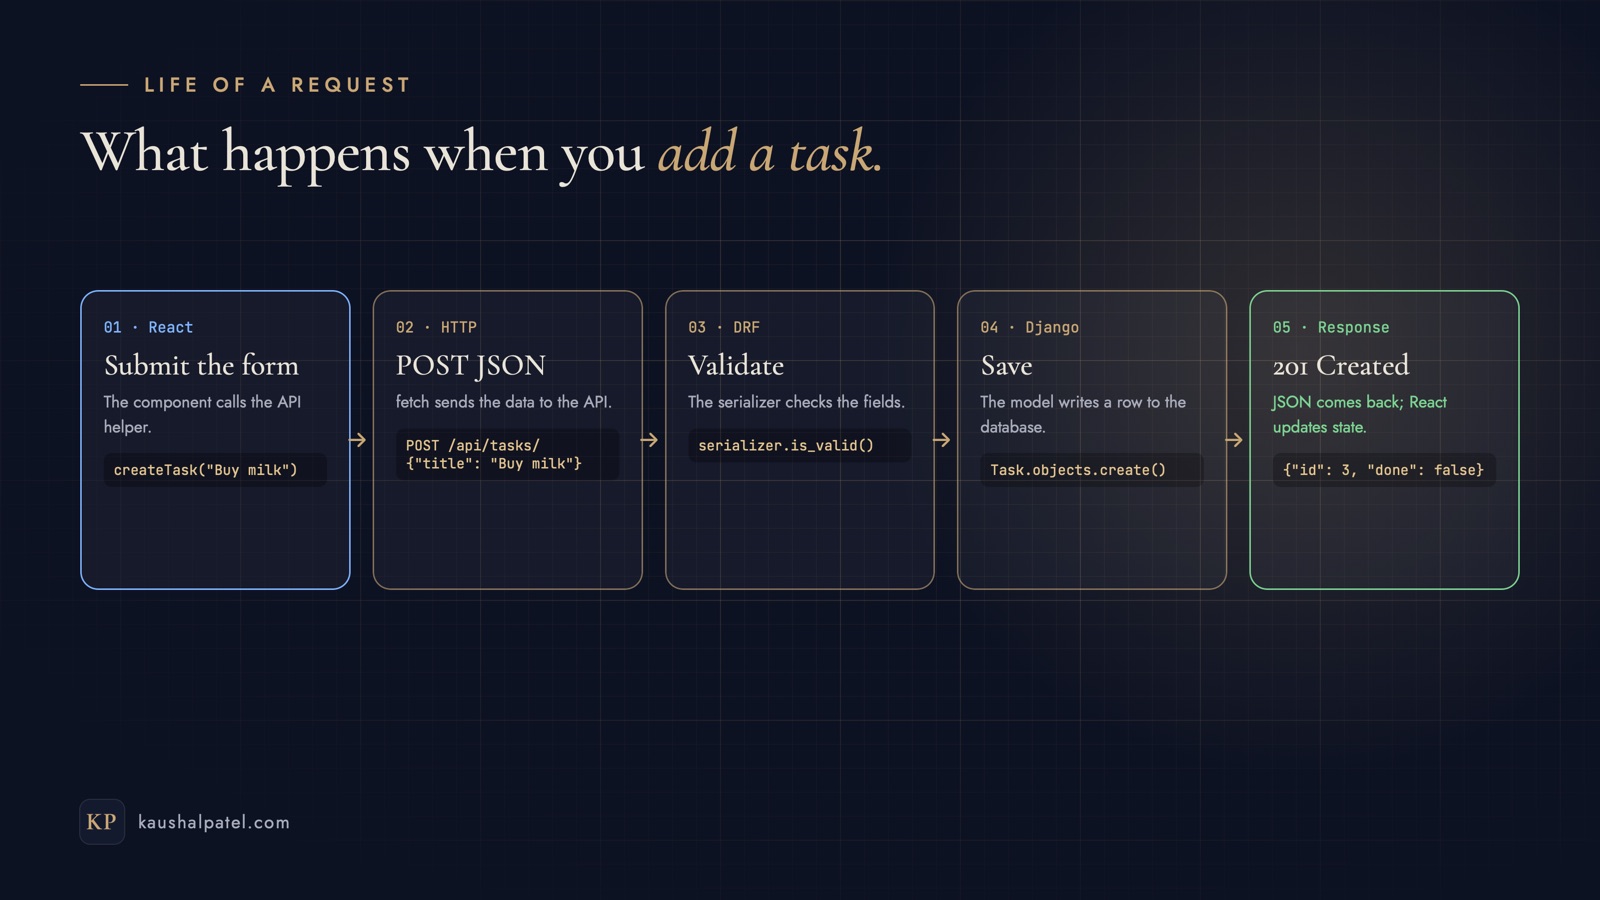
What happens when you click Add: from the React form to the database and back.
Step 9 — Commit and push to GitHub
Vite doesn’t create its own Git repository, so the front end belongs to the one we made in Step 1. From the fullstack-app folder:
cd ..
git add .
git commit -m "Add React front end for tasks"
Create an empty repository on GitHub (no README), then connect and push:
git remote add origin https://github.com/your-username/fullstack-app.git
git branch -M main
git push -u origin main
For the next feature, work on a branch so main always works:
git switch -c feature/due-dates
# …make your changes…
git add .
git commit -m "Add due dates to tasks"
git push -u origin feature/due-dates
Step 10 — Get it ready for production
In production the two apps usually live on separate addresses, for example app.your-domain.com for React and api.your-domain.com for Django.
Django: set DEBUG = False, read SECRET_KEY and ALLOWED_HOSTS from environment variables, and change CORS_ALLOWED_ORIGINS to your real front-end address, e.g. "https://app.your-domain.com". My guide to deploying Django on Namecheap covers this end to end.
React: build it with npm run build — the result in dist/ is plain static files. It deploys well to Vercel, with VITE_API_URL set to your live API (for example https://api.your-domain.com/api) in the project’s environment variables. Vite bakes it in at build time, so redeploy after changing it. See deploying on Vercel step by step — the Git and domain steps are the same.
Where to go next
Authentication: add login with DRF’s token authentication or JSON Web Tokens (the popular djangorestframework-simplejwt package), then require it with permission_classes = [IsAuthenticated] on the ViewSet.
One owner per task: add a user foreign key to Task and filter the queryset to request.user.
Pagination: set DEFAULT_PAGINATION_CLASS in DRF’s settings — the list response then wraps tasks in results, so update getTasks to match.
Data fetching: as the app grows, a library like TanStack Query handles caching, loading states and refetching for you.
Troubleshooting
The browser console shows a CORS error. Check the address in CORS_ALLOWED_ORIGINS exactly matches the React URL (scheme, host and port, no trailing slash), and that CorsMiddleware sits above CommonMiddleware.
“Couldn’t reach the API”. Make sure python manage.py runserver is running and VITE_API_URL is correct — then restart npm run dev.
A POST or PATCH fails with a redirect or 404. DRF’s URLs end with a slash: call /tasks/ and /tasks/1/, not /tasks.
400 Bad Request when creating a task. The serializer rejected the data — the response body says which field, for example a missing title.
no such table: tasks_task. Run python manage.py makemigrations and migrate.
ModuleNotFoundError: No module named 'rest_framework'. Activate the virtual environment first (source .venv/bin/activate), then install again.
Your checklist
Django REST Framework API at /api/tasks/, tested in the browsable API
CORS allows the React development address
React reads the API address from VITE_API_URL
Create, list, toggle and delete all work from the UI
Both apps committed to one Git repository and pushed to GitHub
A plan for authentication and permissions before going live
You now have the classic modern stack running end to end: Django and Django REST Framework serving a clean JSON API, and React turning it into a fast interface. Building something on this stack and want a second pair of eyes? Get in touch.
Run a Next.js front end and a Node.js Express API on one Ubuntu server: Git, deploy keys, PM2, Nginx routing, free HTTPS with Certbot and a one-command deploy script.
From create-next-app to a live custom domain: push your Next.js project to GitHub, deploy it on Vercel, add environment variables, preview branches and roll back safely.
Run Django on Namecheap shared hosting with cPanel’s Setup Python App: production settings, Git and SSH deploys, MySQL, static files, HTTPS and a one-command update script.